
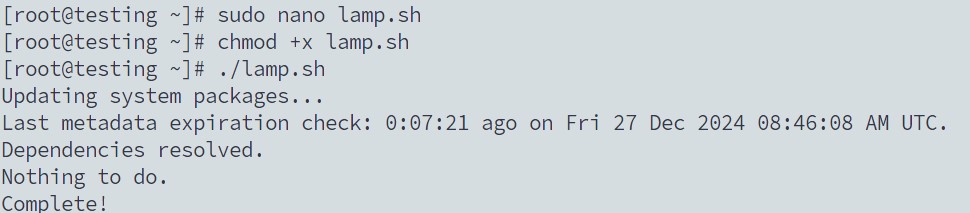
Step 1: Create a bash script for LAMP stack with the below code.
- The below script automatically installs the PHP version 8.3 (latest while writing this documentation) with all the necessary PHP modules needed for Nextcloud
- The script also installs MariaDB and generates random credentials of Root DB user and also creates database needed for Nextcloud Installation
LAMP Stack Installation Script
Script copied
#!/bin/bash
# LAMP stack installation script for Rocky Linux 9
# Automates LAMP setup, including MySQL secure installation with random root password.
# Update system packages
echo "Updating system packages..."
sudo dnf update -y
# Install necessary dependencies for PHP repositories
echo "Installing required dependencies..."
sudo dnf install -y dnf-utils
# Enable Remi's repository for PHP 8.3
echo "Enabling Remi repository for PHP 8.3..."
sudo dnf install -y https://rpms.remirepo.net/enterprise/remi-release-9.rpm
sudo dnf module reset php -y
sudo dnf module enable php:remi-8.3 -y
# Install PHP 8.3 and required extensions
echo "Installing PHP 8.3 and required extensions..."
sudo dnf install -y php php-cli php-common php-fpm php-json php-opcache php-mbstring php-xml php-gd php-mysqli php-pdo php-zip php-bcmath php-curl php-intl php-memcached php-imagick php-redis php-apcu
# Install MariaDB server
echo "Installing MariaDB server..."
sudo dnf install -y mariadb-server
# Enable and start MariaDB service
echo "Enabling and starting MariaDB..."
sudo systemctl enable mariadb --now
# Generate a strong random password for the MySQL root user
MYSQL_ROOT_PASSWORD=$(openssl rand -base64 16 | tr -d '/+=')
# Configure MariaDB root user password and secure installation non-interactively
echo "Configuring MariaDB..."
sudo mysql -e "ALTER USER 'root'@'localhost' IDENTIFIED BY '${MYSQL_ROOT_PASSWORD}';"
sudo mysql -e "DELETE FROM mysql.user WHERE User='';"
sudo mysql -e "DROP DATABASE IF EXISTS test;"
sudo mysql -e "FLUSH PRIVILEGES;"
# Install Apache HTTP Server (httpd)
echo "Installing Apache..."
sudo dnf install -y httpd
# Enable and start Apache service
echo "Enabling and starting Apache..."
sudo systemctl enable httpd --now
# Set Apache and PHP-FPM to run on boot
echo "Enabling Apache and PHP-FPM to start on boot..."
sudo systemctl enable php-fpm
# Restart Apache to apply PHP settings
echo "Restarting Apache..."
sudo systemctl restart httpd
# Generate random credentials for a new database and user
DB_NAME=$(openssl rand -hex 6)
DB_USER=$(openssl rand -hex 6)
DB_PASS=$(openssl rand -base64 12 | tr -d '/+=') # Removes problematic characters
# Create a new database and user
echo "Creating database and user..."
sudo mysql -uroot -p"${MYSQL_ROOT_PASSWORD}" -e "CREATE DATABASE ${DB_NAME};"
sudo mysql -uroot -p"${MYSQL_ROOT_PASSWORD}" -e "CREATE USER '${DB_USER}'@'localhost' IDENTIFIED BY '${DB_PASS}';"
sudo mysql -uroot -p"${MYSQL_ROOT_PASSWORD}" -e "GRANT ALL PRIVILEGES ON ${DB_NAME}.* TO '${DB_USER}'@'localhost';"
sudo mysql -uroot -p"${MYSQL_ROOT_PASSWORD}" -e "FLUSH PRIVILEGES;"
# Store credentials in a secure location
echo "Storing credentials securely..."
CREDENTIALS_FILE="/root/db_credentials.txt"
echo "DB_NAME=${DB_NAME}" > ${CREDENTIALS_FILE}
echo "DB_USER=${DB_USER}" >> ${CREDENTIALS_FILE}
echo "DB_PASS=${DB_PASS}" >> ${CREDENTIALS_FILE}
echo "MYSQL_ROOT_PASSWORD=${MYSQL_ROOT_PASSWORD}" >> ${CREDENTIALS_FILE}
chmod 600 ${CREDENTIALS_FILE}
# Display PHP and MariaDB versions
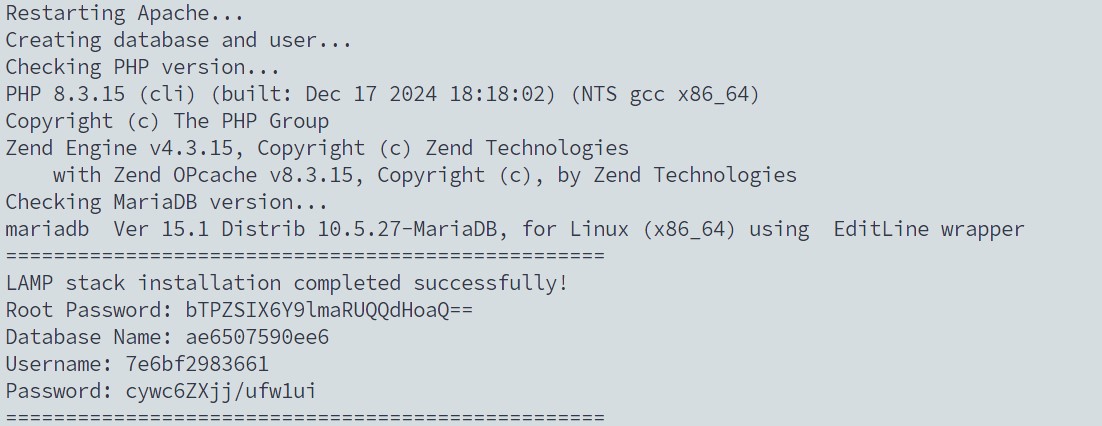
echo "Checking PHP version..."
php -v
echo "Checking MariaDB version..."
mariadb --version
# Display generated credentials
echo "=================================================="
echo "LAMP stack installation completed successfully!"
echo "Root Password: ${MYSQL_ROOT_PASSWORD}"
echo "Database Name: ${DB_NAME}"
echo "Username: ${DB_USER}"
echo "Password: ${DB_PASS}"
echo "Credentials saved in: ${CREDENTIALS_FILE}"
echo "=================================================="
** Create a script file ending with .sh and make it executable. Then Run it as shown below
** Once the installation completes, it will display random credentials
Step 2: Download Nextcloud and configure the server
** Click here to choose the compatible version of nextcloud or choose and download accordingly.
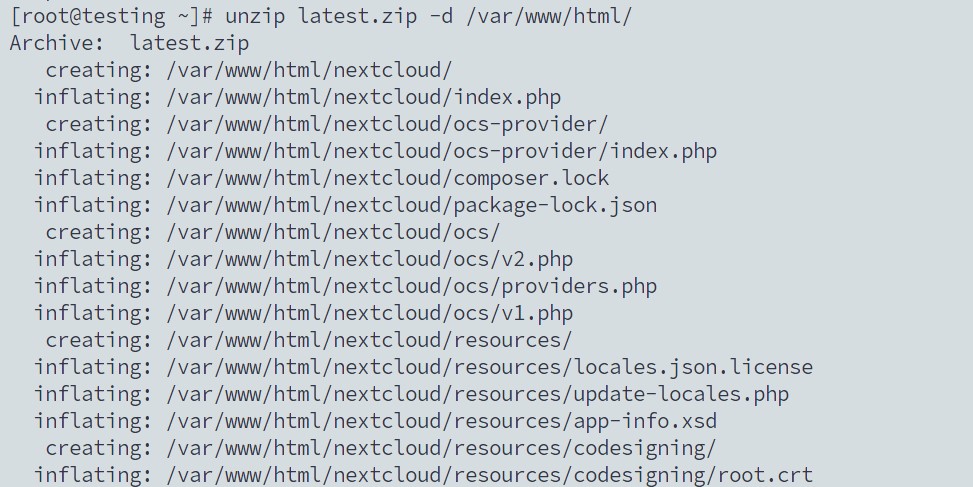
Note: In this guide, we have used the latest.zip version of the nextcloud.
Script copied
[root@testing ~]# wget https://download.nextcloud.com/server/releases/latest.zip
Script copied
[root@testing ~]# unzip latest.zip -d /var/www/html/
Script copied
[root@testing ~]# mkdir -p /var/www/html/nextcloud/data
Script copied
[root@testing ~]# chown -R apache:apache /var/www/html/nextcloud/
Script copied
[root@testing ~]# chcon -t httpd_sys_rw_content_t /var/www/html/nextcloud/ -R
** Change the Apache configuration i.e., httpd.conf file
Script copied
[root@testing ~]# cd /etc/httpd/conf
Script copied
[root@testing ~]# sudo nano httpd.conf
** Make the default root of the server recognize /var/www/html/nextcloud as the root directory.
- Old Value: DocumentRoot “/var/www/html”
- New Value: DocumentRoot “/var/www/html/nextcloud”
** Change the Require granted to allow all inside /var/www/html/nextcloud directory
- Old Value:
# Further relax access to the default document root:
<Directory “/var/www/html”>
Options Indexes FollowSymLinks
AllowOverride None
Require all granted
</Directory> - New Value:
# Further relax access to the default document root:
<Directory “/var/www/html/nextcloud”>
Options Indexes FollowSymLinks
AllowOverride all
Require all granted
</Directory>
** Add index.php so the Apache server recognizes it as the default root file of any folder.
- Old Value:
<IfModule dir_module> DirectoryIndex index.html </IfModule> - New Value:
<IfModule dir_module>
    DirectoryIndex index.html index.php
</IfModule>
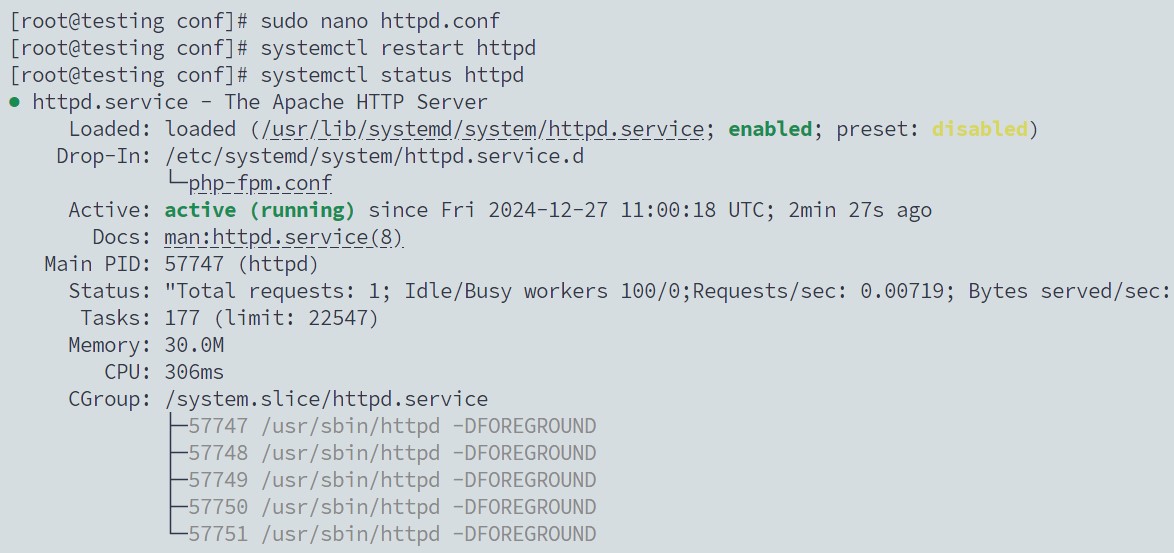
** Restart the Apache Server
Script copied
[root@testing ~]# systemctl restart httpd
** Create a nextcloud.conf file inside Apache configuration directory
Script copied
[root@testing ~]# sudo nano /etc/httpd/conf.d/nextcloud.conf
Script copied
<VirtualHost *:80>
    DocumentRoot "/var/www/html/nextcloud"
    ServerName cloud.domain.com
    Redirect / https://cloud.domain.com/

    <Directory "/var/www/html/nextcloud/">
        Options MultiViews FollowSymlinks
        AllowOverride All
        Order allow,deny
        Allow from all
    </Directory>

    <IfModule mod_headers.c>
    Header always set Strict-Transport-Security "max-age=31536000; includeSubDomains; preload"
    Header always set X-Frame-Options "SAMEORIGIN"
    Header always set X-Content-Type-Options "nosniff"
    </IfModule>

    TransferLog /var/log/httpd/nextcloud_access.log
    ErrorLog /var/log/httpd/nextcloud_error.log
</VirtualHost>

<VirtualHost *:443>
    ServerName cloud.domain.com
    DocumentRoot "/var/www/html/nextcloud"

    <IfModule mod_headers.c>
    Header always set Strict-Transport-Security "max-age=31536000; includeSubDomains; preload"
    Header always set X-Frame-Options "SAMEORIGIN"
    Header always set X-Content-Type-Options "nosniff"
    </IfModule>

    SSLEngine on
    SSLCertificateFile "/etc/ssl/nextcloud/main.crt"
    SSLCertificateKeyFile "/etc/ssl/nextcloud/private.key"
    SSLCertificateChainFile "/etc/ssl/nextcloud/ca.crt"

    Protocols h2 http/1.1
</VirtualHost>
** Once the system is restarted open the browser with the IP of the server i.e., http://server_ip
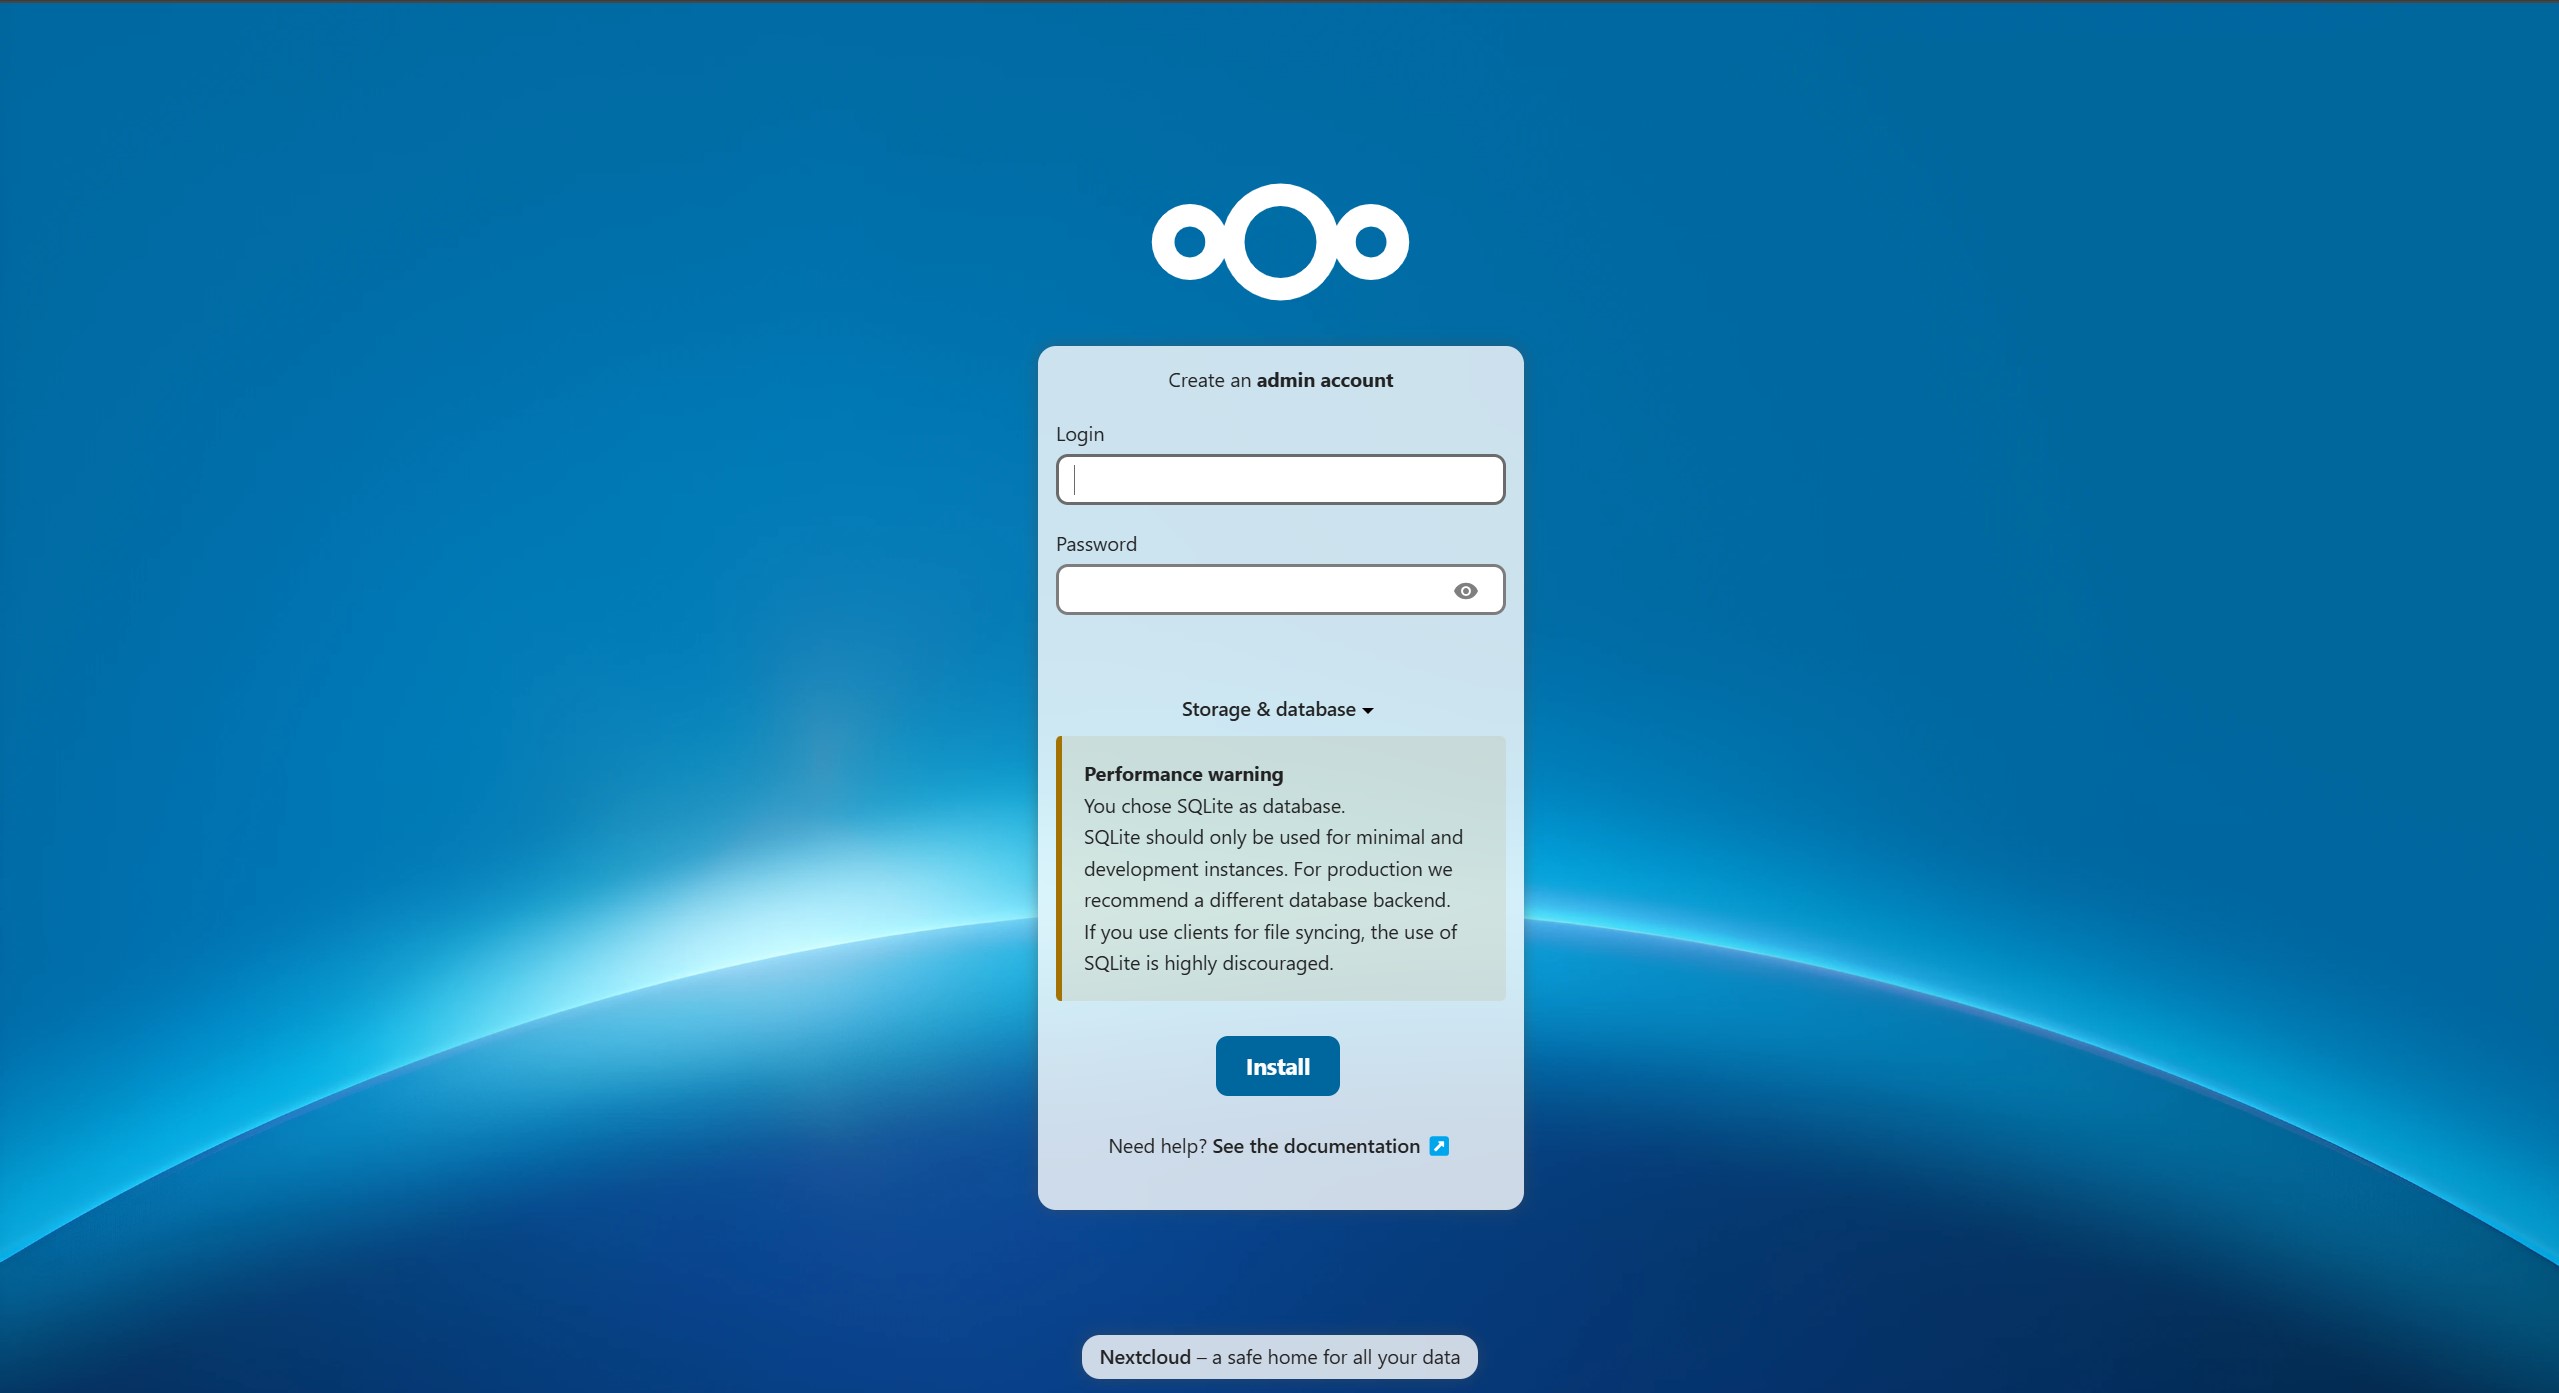
** Enter the details displayed from the Bash Script for the database. Once Done, the Nextcloud is Successfully Installed.
Want to Configure more in Nextcloud ?? Read here below:

More To Do With Nextcloud
29 December 2024
1. Run OCC Command Globally.
Code Box Example
Whenever we have to recall the...